Ako zachrániť filter olejovej vane Ariela
Ako zachrániť filter olejovej vane Ariela
How to save an Ariel oil pan strainer
Motocykle starších ročníkov si v svojej dobe väčšinou zažili omnoho horšie spevnené cesty, ako sú dnes. Určite ste sa preto už stretli s problémom poškodenej olejovej vane, či prasknutých karterov. Dnes by som vám rád priblížil postup pri oprave hrubého filtra na motore Ariel 500 rok 1929. Nie je potrebné vždy siahnuť po replikovom diely, aj keď sa vám zdá, ten originálny už zničený.
Back in the days the old motorcycles usually rode on much worse roads than we have now. So you surely came to a problem of broken oil pan or cracked crankcase covers. Today I would like to show you the way to repair the oil strainer on the engine of 1929 Ariel 500. Not always you have to buy a replica of this part even when it seems that the original one is ruined.
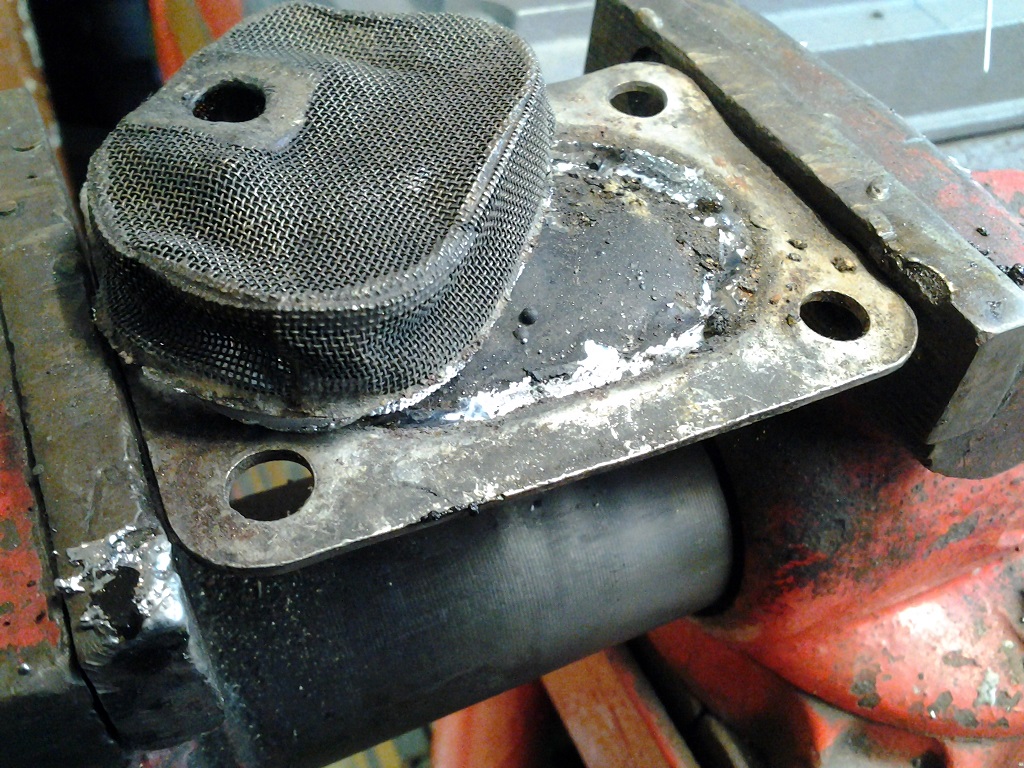
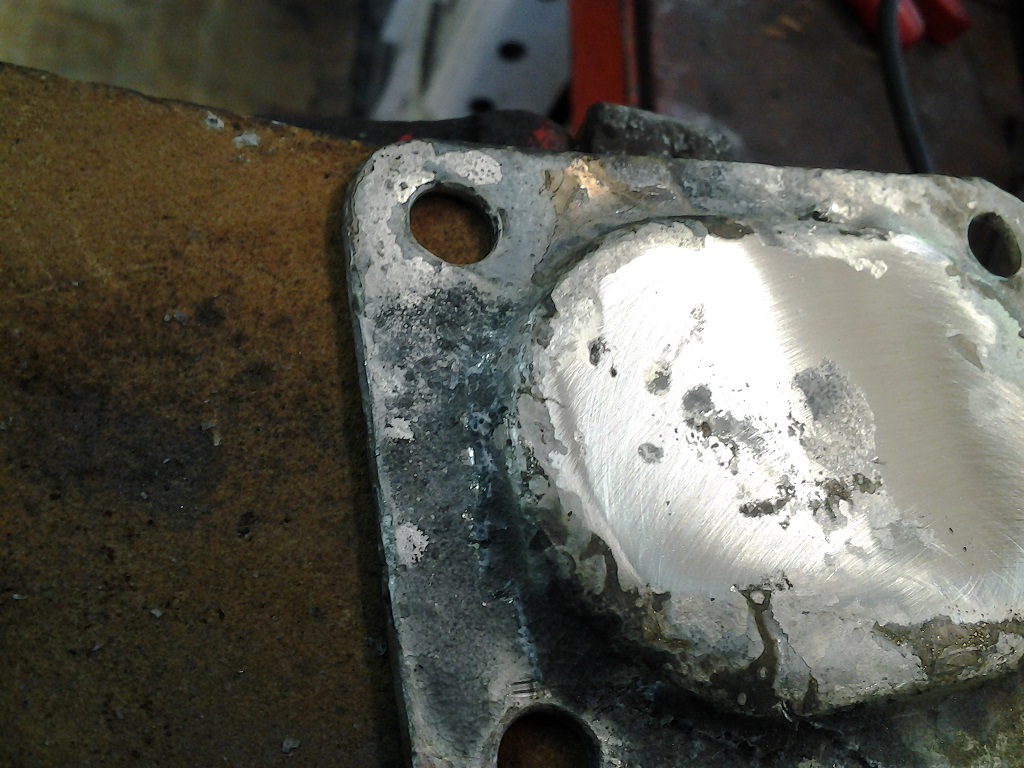
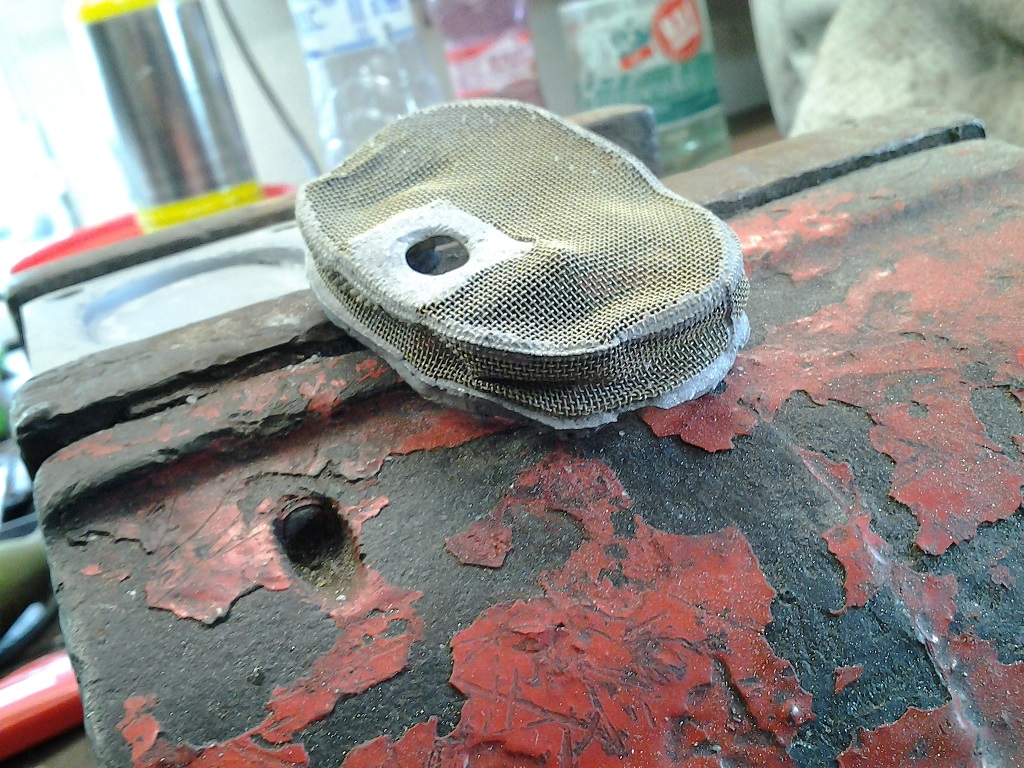
Po zmontovaní plechového zberača oleja zo spodnej časti motora sme mohli pozorovať množstvo väčších či menších škrabancov a sitko zberača oleja už tiež nevykazovalo znaky funkčnosti. Rozhodli sme sa preto pristúpiť k jeho celkovej oprave. Najdôležitejšie bolo zvoliť správny postup. Samotná súčiastka sa skladá z rôznych materiálov a každý inak reaguje na teplo. Mosadzná sieťovina z ktorej je filter vyrobený je po obvode spájkovaná cínom. Pod sieťovinou sa nachádza ešte prúžok tiež mosadzného plechu pre ukotvenie sacej rúrky oleja a spodná časť olejovej vane je oceľová. Veľmi dôležité je nahrievať olejovú vaňu pomaly z dola, inak sa nám sieťovina rozpadne. Aj malým ručným horákom dosiahnete dostatočnú teplotu na oddelenie sieťoviny.
After the removal of the steel plate oil collector from the bottom of the engine we could see smaller or larger scratches and the oil strainer on the collector did not seem to function anymore. So we decided to repair it completely. The most important was to choose the right procedure. The part itself consists of various materials and each of them reacts differently to heat. The brass mesh of which the strainer is made of is soldered on the edge by tin. Under the mesh we could find a brass strip which secures the suction tube and the lower part of the oil pan is made of steel. It is necessary to heat the oil pan slowly from the bottom, otherwise the mesh will fall apart. Even with a small heat gun you will reach the heat sufficient to separate the mesh.


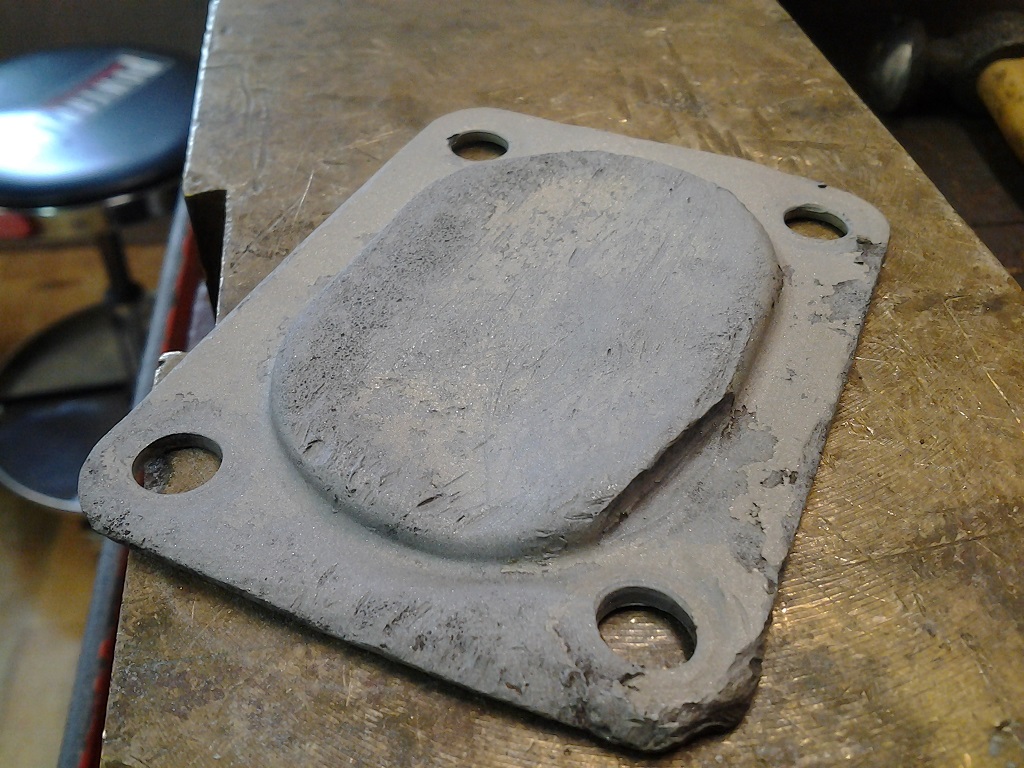

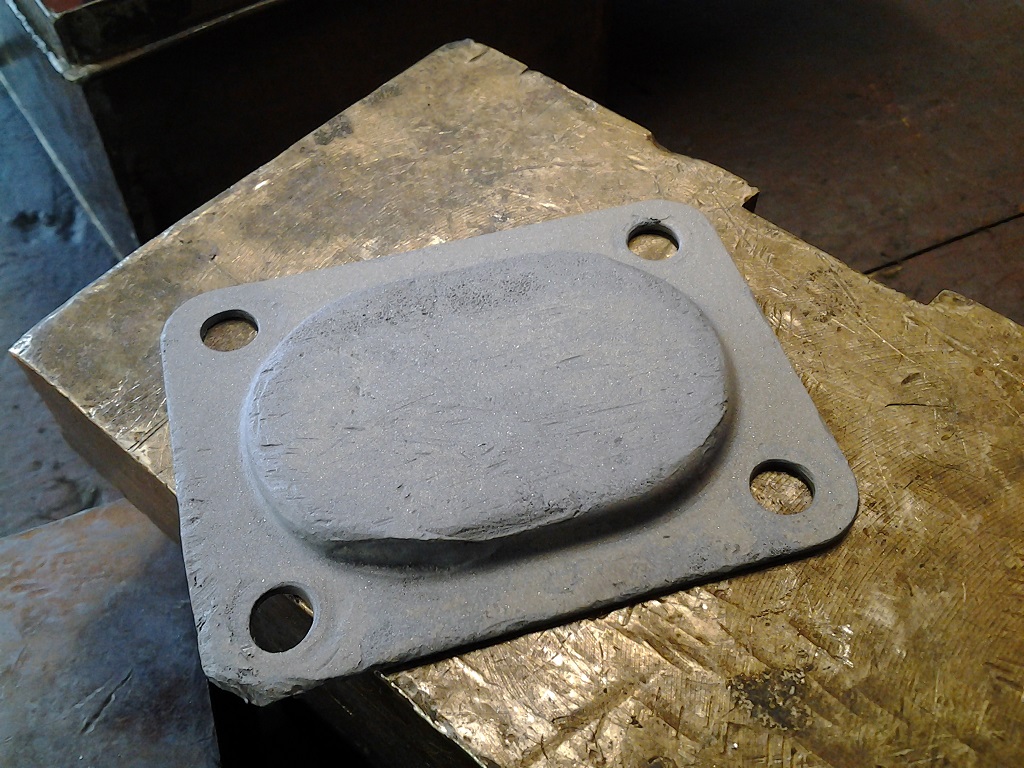
Keď sa vám podarí oddeliť časti filtra od seba, skúste ich nahrievať samostatne a jemným potrepaním odstráňte zvyšky cínu. Hlavne pozor na sieťovinu, je citlivá na teplo a mohla by sa vám rozísť. Spodnú oceľovú časť nahrejte a buchnutím o pevnú podložku odstráňte zvyšný cín. Obe časti nechajte vychladnúť a opieskujte. Oceľovú spodnú časť pomocou na plocho zabrúseného jamkovača vyrovnajte do čo naj požadovanejšieho tvaru a hlboké ryhy opravte mosadzou, striebrom či COčkom a obrúste prebytočný materiál .My sme použili strieborné obaľované tyčinky s obsahom 40%. Nepoužívajte cín! Zrovnajte aj vnútornú stranu . Je to styčná plocha pre tesnenie.
When you manage to separate the strainer parts from each other, try to heat them separately and remove the remains of the solder tin by gentle shaking. Most of all watch out for the mesh, it is sensitive to heat and may fall apart. Heat the bottom steel part and remove the remaining solder tin by hitting it towards a firm surface. Leave both parts to cool down and have them sand blasted. Smoothen the bottom steel part by a flat grinded hole punch to the most desired shape. The grooves that are too deep should be repaired by brass, silver or welding and the surplus material grinded. We used 40% silver covered sticks. Do not use the solder tin! Smoothen the inner side. It is a contact surface of the seal.
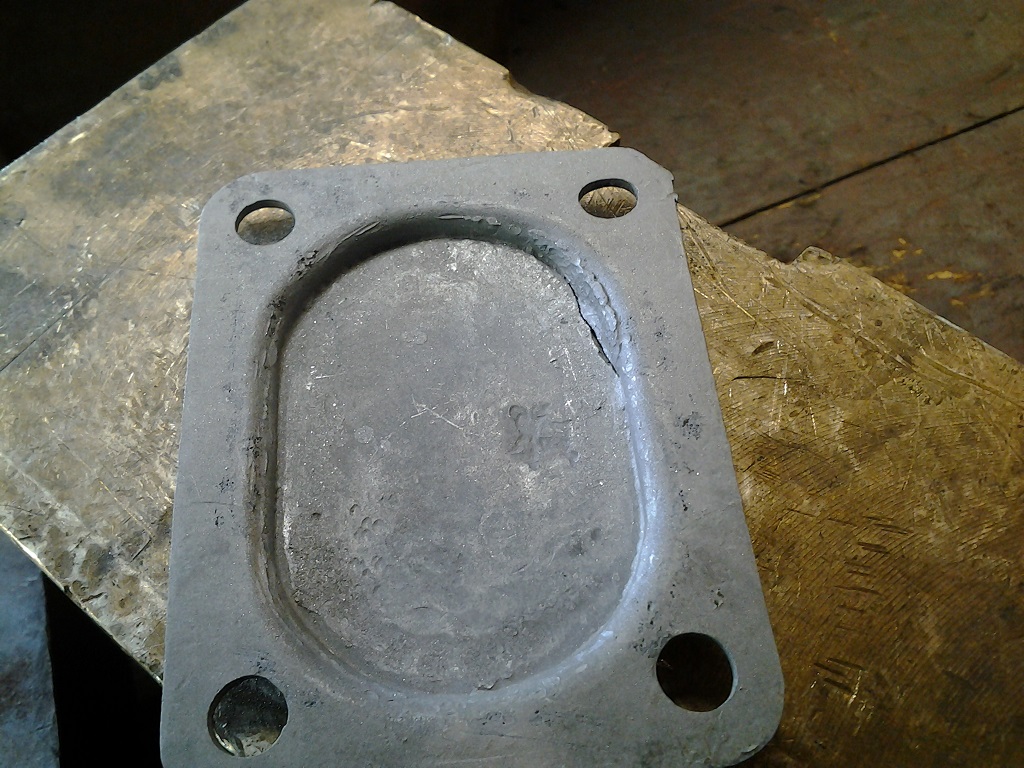
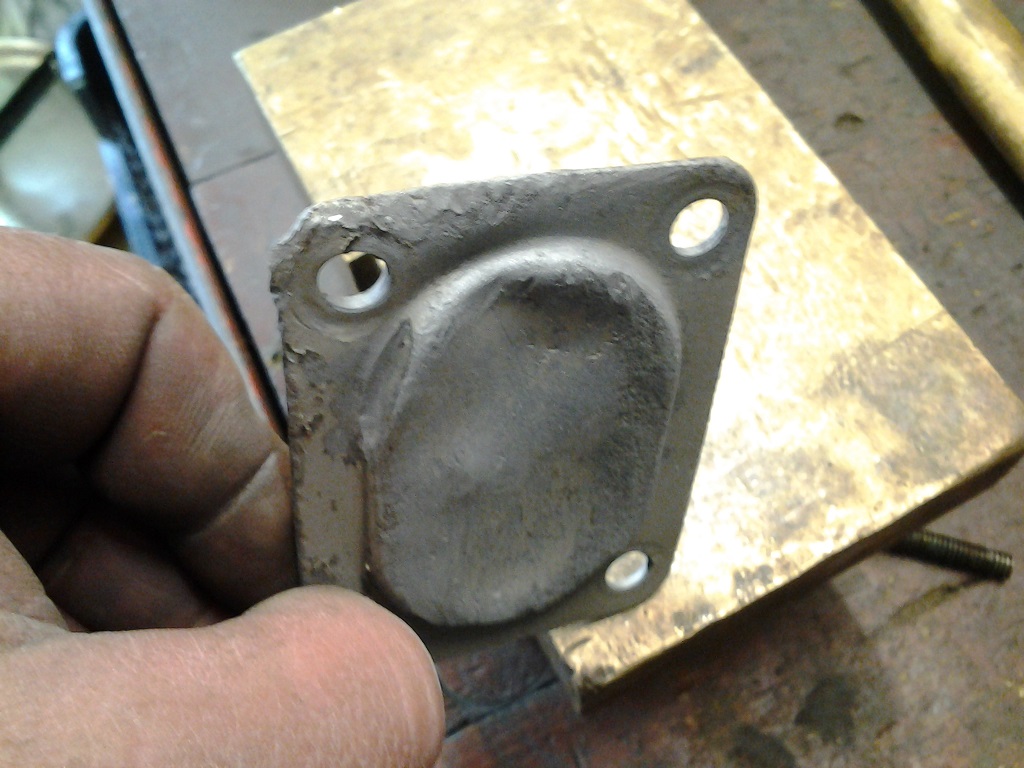
Zrovnajte opieskovanú sieťovinu do požadovaného tvaru a vložte ju do oceľovej spodnej časti. Ak všetko pasuje do seba a sieťovina neodstáva, môžete prejsť k spojeniu oboch častí. My sme použili na lepšie previazanie spájkovaciu kyselinu, ktorou sme natreli styčné plochy.
Flatten the sand blasted mesh to a desired shape and insert it to the lower steel part. When everything is in place and the mesh is not sticking out, you can move on to connecting the both parts. We used a solder acid which we applied to the contact surfaces to make the connection even firmer.


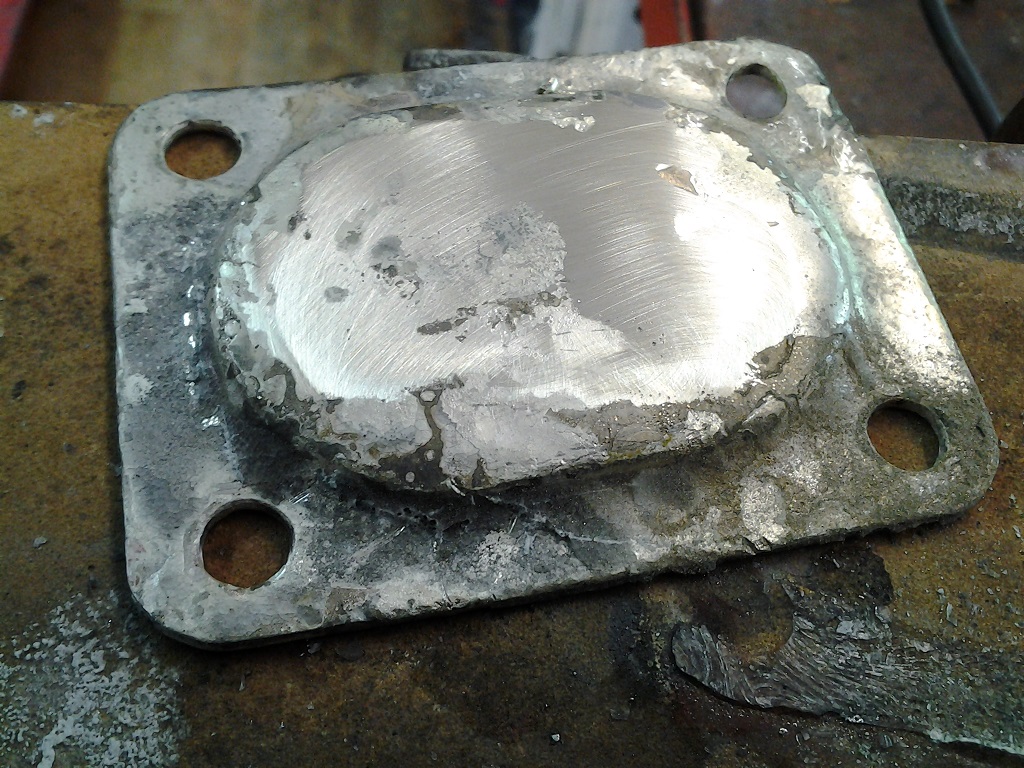
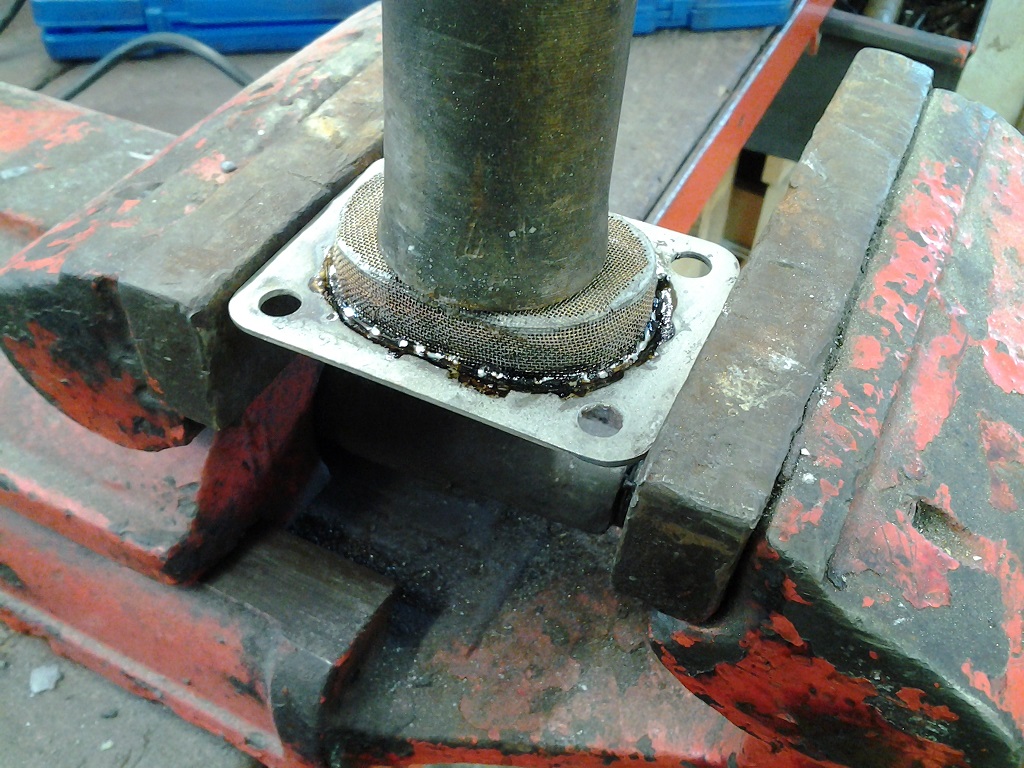
Upnite za spodnú oceľovú časť do zveráku, zaťažte z vrchnej časti kovovým predmetom (pomáha odviesť teplo z hornej časti sieťky) a pomaly zospodu zohrievajte horákom do momentu , keď spozorujete na stranách tavenie cínu. Pomaly priložte po stranách cín a cez otvor na olejovú rúrku previažte aj s plechovou výstuhou. Na spojenie sme použili obyčajný cín o hrúbke 1,5mm s obsahom kolofónie . Nechajte vychladnúť. Prípadné kazy na sieťovine opravte malou ručnou spájkovačkou. Preleštite a môžete dať chrómovať.
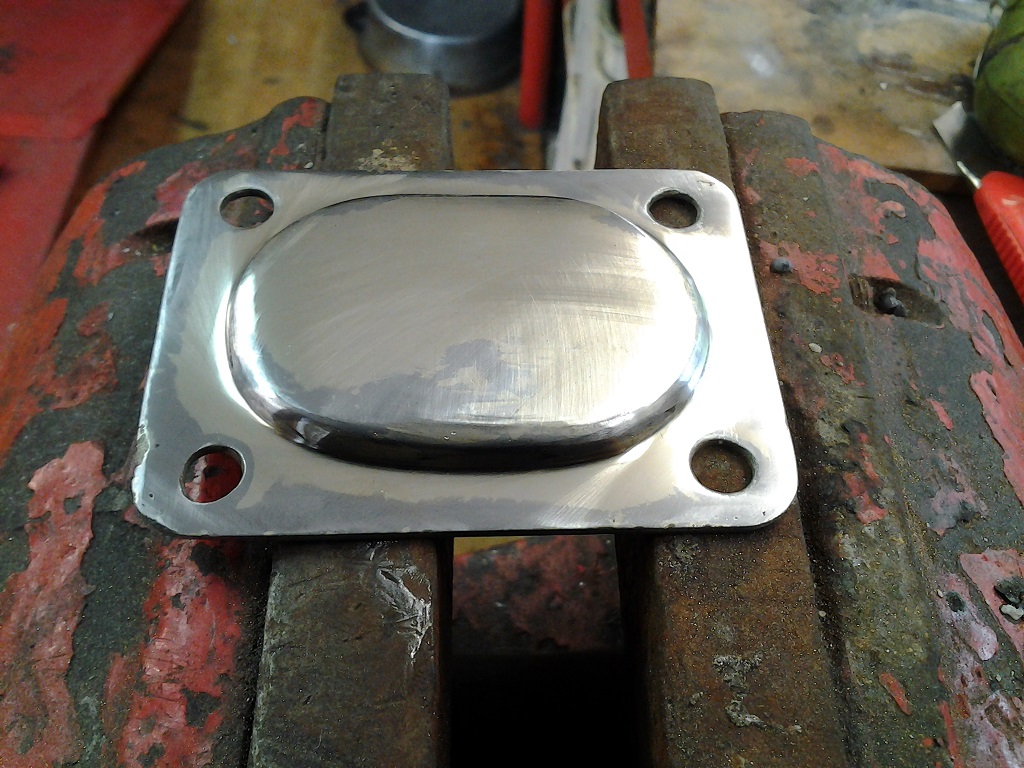
Secure the bottom steel part to a clamp, put a metal object on the top (it helps diverting the heat from the upper side of the mesh) and slowly heat from the bottom side till you see the solder tin melting on the sides. Slowly apply the solder tin on the sides and tie together through the oil tube hole together with the steel plate reinforcement. We used ordinary 1,5 mm soldering tin with colofony. Let it cool down. Small defects on the brass mesh can be repaired by a small soldering iron. Polish the surface and you can have it chrome plated if desired.


Veľa šťastných kilometrov želajú autori: Burger Karol, Patrik Lehotský
Wishes of many happy miles from authors: Burger Karol, Patrik Lehotský
Translated by Rastislav Chmelár
Komentáre
Pridať komentár